Physical Address
304 North Cardinal St.
Dorchester Center, MA 02124
Physical Address
304 North Cardinal St.
Dorchester Center, MA 02124

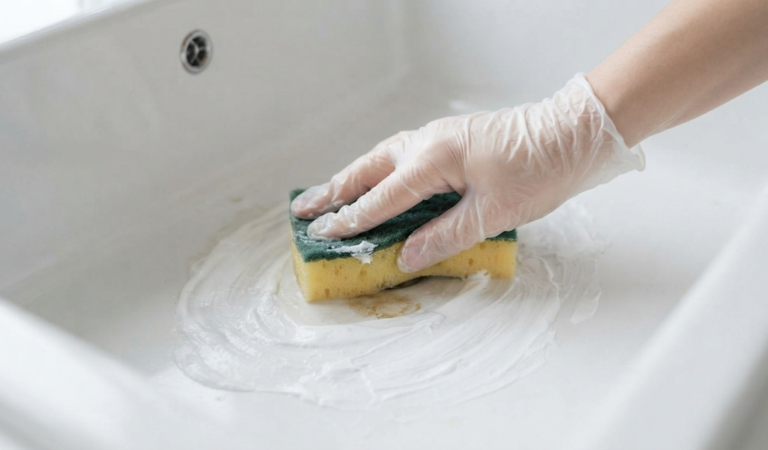
We’ve all been there. You look at your toaster and realize it’s holding a small mountain of crumbs from last year, or you open your dishwasher only to be met with a ‘funky’ smell that definitely shouldn’t be there. We use our home appliances every single day, yet they are often the most neglected items when cleaning your home.
But here’s the thing: knowing how often you should clean your appliances isn’t just about making your kitchen look sparkly for guests. It’s about hygiene, food safety, and—most importantly for your wallet—making sure those expensive machines actually last. A clogged filter or a greasy motor has to work twice as hard, leading to higher energy bills and early breakdowns.
In this guide, we’re going to break down the ‘when’ and ‘how’ for every major machine in your house. From the daily wipe-downs to the deep-cleaning sessions you only need to do once a season, here is everything you need to know to keep your home running smoothly.
You should clean your appliances based on usage frequency to maintain hygiene and efficiency. Daily tasks include wiping spills and cleaning frequently used items, weekly cleaning covers refrigerators and microwaves, while deeper cleaning like ovens, dishwashers, and coils should be done monthly or every 3–6 months. Regular maintenance helps extend appliance lifespan and improve performance.
Before we dive into the schedule, let’s talk about the why. When you buy home appliances, you’re making an investment. Most modern refrigerators or ovens are designed to last 10 to 15 years, but that lifespan is cut short if dust and grime are allowed to build up.
Think of it like a car. You wouldn’t drive 50,000 miles without an oil change, right? Your appliances are the same. Regular cleaning prevents mold growth, reduces fire hazards (especially in dryers and ranges), and ensures your food stays ‘fresh and safe’ for your family. Furthermore, a clean appliance runs more efficiently. When a refrigerator coil is caked in dust, it uses more electricity to maintain a cool temperature, which shows up directly on your monthly utility bill.
The oven is perhaps the most dreaded chore in the kitchen. Between the burnt-on cheese and the mysterious smoky smells, it’s easy to keep the door shut and ignore it. However, a dirty oven is a fire hazard and can actually change the taste of your food.
Daily: Wipe up any fresh spills as soon as the oven cools down.
Monthly: Perform a light clean or use an “Easy Clean” steam function.
Every 6 Months: A deep scrub or a pyrolytic (high-heat) cleaning cycle.
If you have a high-end oven, you might have a setting called ‘pyrolytic cleaning’. This is a lifesaver. It heats the oven to extremely high temperatures—around 500°C—which literally turns food scraps into ash. Once the cycle is done and the oven is cool, you just wipe the ash away with a damp cloth. It’s the ultimate ‘hands-off approach’ to maintenance.
If you don’t have this feature, a paste of baking soda and water left overnight on the oven floor can work wonders. Simply spray it with a little vinegar the next morning, and the foaming action will lift the grease right off.
Your fridge is the keeper of your food, so hygiene here is non-negotiable. While most of us wipe the shelves when something spills, we often forget the hidden spots that keep the machine running.
You should aim to clear out your fridge weekly before you go grocery shopping. Toss the expired yogurt and wilted lettuce. Once a month, take out the drawers and wash them in warm, soapy water. This prevents cross-contamination and ensures that your fresh produce isn’t sitting in a petri dish of old bacteria.
This is the part most people miss. The condenser coils (usually located at the back or bottom) get covered in pet hair and dust. If they are dirty, your fridge has to work harder to stay cold. Vacuum these coils every 6 months to save money on your electric bill. Use a narrow vacuum attachment or a specialized coil brush to get into those tight spaces.
We use it for popcorn, leftovers, and defrosting meat, yet we often wait until the walls are splattered with tomato sauce before we act. So, how often should you clean your microwave?
The short answer is: once a week.
If you let food splatters sit, they harden and become incredibly difficult to remove. Worse, they can create ‘hot spots’ that damage the interior lining of the microwave.
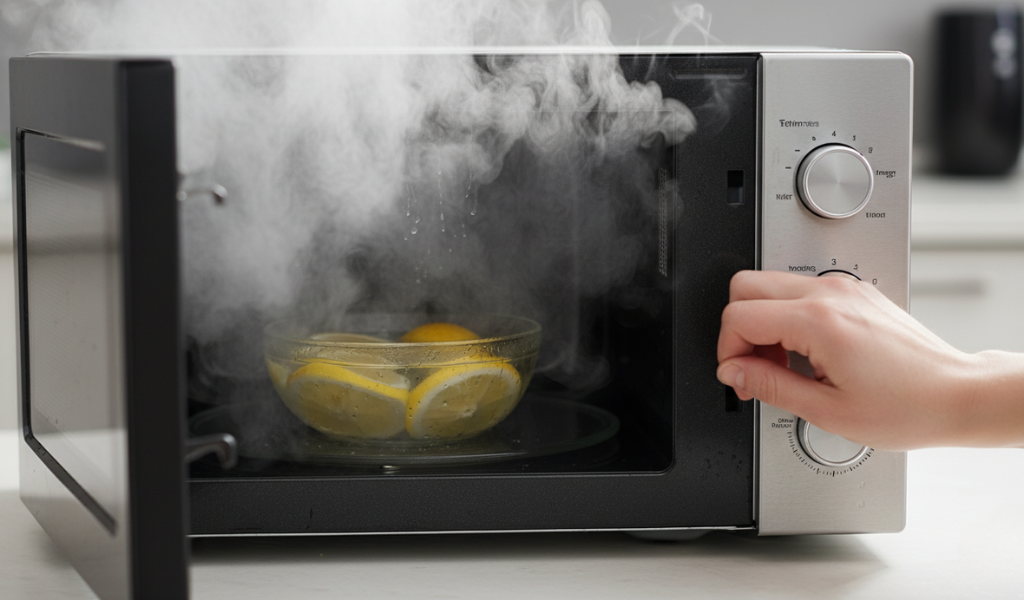
Fill a microwave-safe bowl with one cup of water and a few slices of lemon (or a tablespoon of vinegar).Microwave on high for 3-5 minutes until the water is boiling and the window is steamy.Let it sit for 5 minutes without opening the door. The steam will loosen all the gunk.Open the door and simply wipe the interior with a soft cloth. It works like magic!
Don’t forget the rotating plate (the turntable). Most are dishwasher safe, so pop it in with your dinner dishes once a week to keep it sparkling.
It seems ironic that a machine designed to wash things needs washing itself, but it’s true. Grease, food particles, and limescale can build up in the filter and spray arms.
How often should you clean your dishwasher? You should aim for a deep clean every 1 to 3 months.
The Filter: Pull out the bottom rack and remove the cylindrical filter. Rinse it under hot water to get rid of trapped food. If it feels slimy, use an old toothbrush with a bit of dish soap.
The Refresh: Place a bowl of white vinegar on the top rack and run a hot cycle. This kills odors and breaks down mineral buildup from hard water.
The Seals: Wipe the rubber gaskets around the door. This is where mold likes to hide, and a quick wipe with a damp cloth can prevent leaks.
If your clothes are starting to smell a bit musty even after a wash, your washing machine is likely the culprit. Proper care of your laundry home appliances can prolong the life of your wardrobe and the machine itself.
Modern high-efficiency (HE) washers are prone to mold, especially around the rubber door seal (the gasket) in front-loaders.
Monthly Deep Clean: Run a “Clean Washer” cycle with a specialized cleaner or a cup of bleach. This removes the “biofilm” (a mix of soap scum and bacteria) that builds up behind the drum.
The Gasket: After every few loads, wipe the rubber seal and pull it back to check for trapped socks or coins.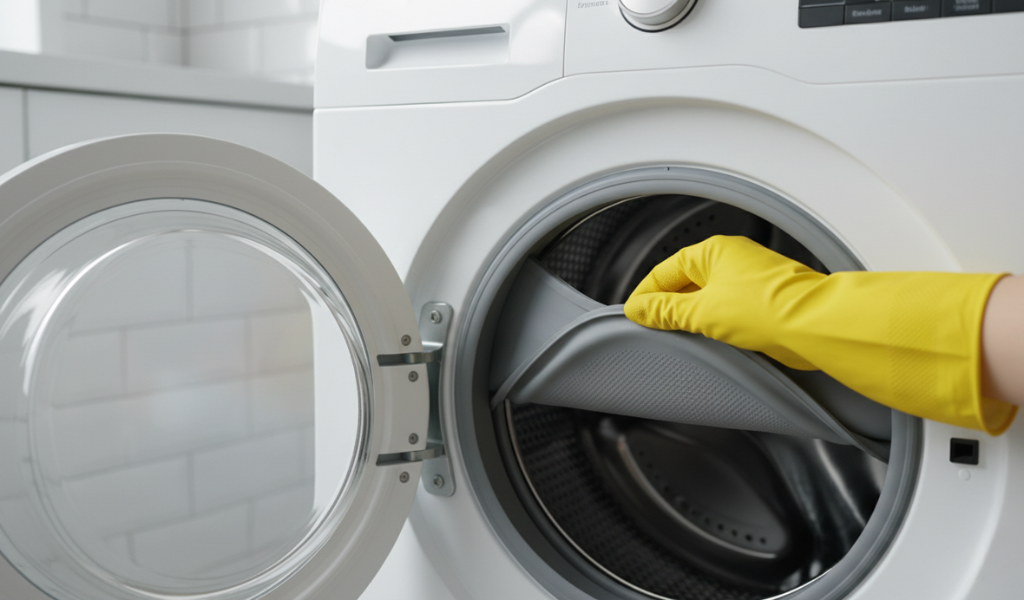
The Detergent Drawer: Pull the drawer out entirely once a month. You’ll be surprised how much moldy soap residue builds up in the compartment.
Pro Tip: Always leave the door open after a wash to let the drum air out. This is the single best way to prevent odors.
The dryer is one of the most common causes of house fires, making its maintenance a top priority.
The Lint Screen: Clean this after every single load. Even a thin layer of lint restricts airflow.
The Drum: Occasionally, dryer sheets can leave a waxy film on the moisture sensors (the little metal bars inside). Wipe them with a bit of rubbing alcohol to keep your dryer sensing correctly.
The Vent Hose: Once a year, disconnect the large silver hose from the back and vacuum it out. If you have a long vent path to the outside of your house, consider hiring a professional to blow out the line. This ensures your dryer isn’t working overtime and reduces fire risks.
While we focus on the big items, small home appliances can harbor bacteria and dust too. These are the tools we use for our morning coffee and quick snacks, so they deserve a spot on your clean your home checklist.
Calcium and minerals from your water build up inside the heating elements.
Daily: Rinse the carafe and the filter basket.
Monthly: “Descale” the machine. Fill the reservoir with half vinegar and half water, run a brew cycle halfway, let it sit for 30 minutes, then finish the cycle. Run two more cycles with plain water to rinse. Your coffee will taste 100% better!
Crumb buildup isn’t just messy; it’s a fire hazard.
Weekly: Slide out the crumb tray and empty it. If your toaster doesn’t have a tray, turn it upside down over the sink and give it a gentle shake.
Monthly: Wipe the exterior and the glass door of toaster ovens with a degreaser to prevent “baked-on” yellow stains.
Air fryers are basically small convection ovens, and they get greasy fast.
Every Use: Wash the basket and tray with warm soapy water. Never let grease sit and reheat, as it will become permanent.
Monthly: Flip the machine over (when unplugged!) and check the heating coil. If it’s covered in oil, wipe it with a damp cloth to prevent smoking.
Don’t just rinse it!
After Every Use: Fill the blender halfway with warm water and a drop of dish soap. Run it on high for 30 seconds, then rinse. This cleans under the blades where your hand can’t reach safely.
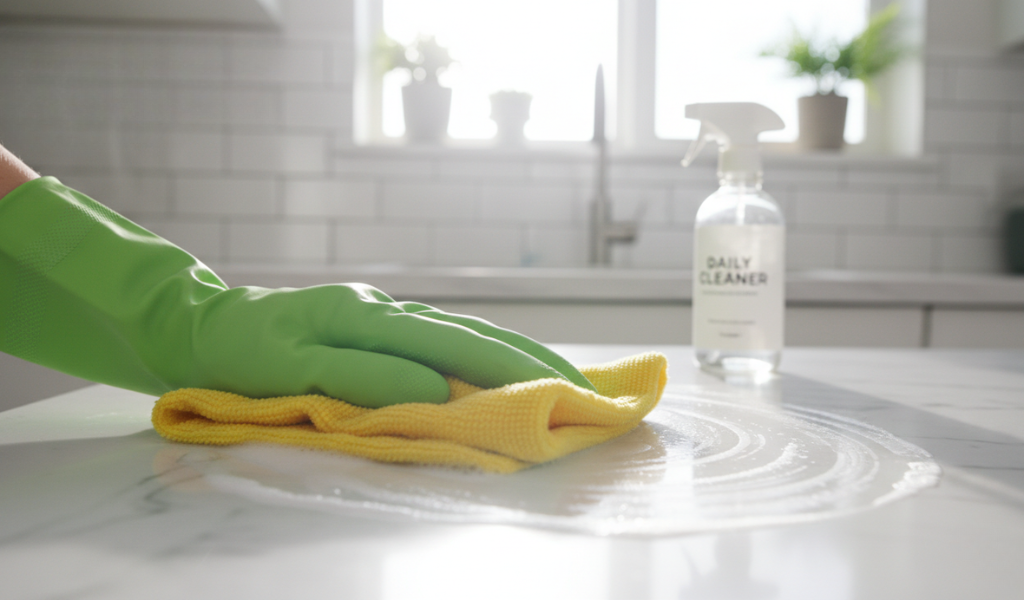
You don’t need a cabinet full of expensive chemicals to clean your home effectively. In fact, many of the best cleaning supplies are already in your pantry. Using gentle supplies also protects the finishes of your machines.
| Supply | Best Used For |
| White Vinegar | Breaking down limescale and deodorizing dishwashers. |
| Baking Soda | Scrubbing stains without scratching surfaces; absorbing fridge odors. |
| Microfiber Cloths | Wiping down stainless steel and glass without streaks. |
| Dish Soap | The safest option for almost all appliance interiors. |
| Rubbing Alcohol | Cleaning electronic touchscreens and stainless steel fingerprints. |
| Old Toothbrush | Getting into the nooks and crannies of seals and buttons. |
Cleaning involves water and electricity, which means you need to be smart about how you handle your home appliances.
Unplug Before Cleaning: For any small appliance (toaster, blender, coffee maker), always pull the plug before you start wiping it down or reaching inside.
Avoid Submerging: Never dunk the base of a motorized appliance in water. You will ruin the motor and potentially cause a short circuit.
Chemical Reactions: Never mix bleach with vinegar or ammonia. This creates toxic gas. Stick to one cleaner at a time.
Cool Down Time: Always wait for ovens, stovetops, and toasters to be completely cool before applying cleaning supplies. Spraying cold liquid on a hot glass oven door can cause it to shatter.
Protect Your Hands: Some cleaners can be harsh. Wear gloves to protect your skin from drying out or reacting to chemicals.
Knowing how often you should clean your appliances helps maintain a clean, efficient home. Daily tasks include wiping surfaces and cleaning frequently used items like air fryers and coffee makers. Weekly cleaning should cover refrigerators, microwaves, and toaster trays to prevent buildup and odors.
On a monthly basis, focus on deeper maintenance like cleaning washing machines, checking dishwasher filters, and wiping seals. Every 3–6 months, vacuum refrigerator coils and descale appliances to keep them running efficiently. Following this routine helps extend appliance lifespan and reduces maintenance costs.
When you understand how often should you clean your appliances, the process becomes easier and more manageable. Instead of dealing with heavy buildup, regular cleaning keeps everything efficient and stress-free. You won’t be spending an entire Saturday scrubbing a year’s worth of grease off the stove; instead, a quick two-minute wipe-down will keep things looking brand new.
By taking care of your home appliances, you’re ensuring a healthier environment for your family and keeping your hard-earned money in your pocket by avoiding unnecessary repairs. So, grab your cleaning supplies and start with the easiest task—maybe give that microwave a steam today! Your future self (and your bank account) will thank you.
Yes, but with caution. The self-clean (pyrolytic) feature uses extreme heat. It is best to stay home while it’s running and ensure your kitchen is well-ventilated, as it can produce some smoke or smells if the oven is very dirty. Never leave oven racks inside during this cycle unless they are specifically labeled as “pyrolytic-safe,” or they will discolor.
While vinegar is a great natural cleaner, avoid using it on rubber seals or gaskets frequently, as the acid can degrade the rubber over time. Also, never use it on natural stone countertops (like marble or granite) near your appliances, as it can etch the surface.
The smell usually comes from a clogged filter or food trapped in the spray arms. Check the very bottom of the tub and ensure the drainage area is clear of debris. Also, check the air gap (the little cylinder on your sink) to make sure it isn’t blocked.
If your clothes are taking more than one cycle to dry or if the outside of the dryer feels unusually hot to the touch, it’s a sign that the vent is clogged and needs immediate cleaning. You might also notice a musty smell or a lack of lint on the lint screen.
To avoid streaks, use a microfiber cloth and a tiny bit of dish soap mixed with water. Always wipe with the grain of the metal. For a ‘showroom shine’, a drop of olive oil or specialized stainless steel spray on a dry cloth works wonders!
Yes! Crumb buildup can eventually catch fire if it touches the heating elements. It’s a simple 30-second job to shake out the tray once a week and prevent your kitchen from smelling like burnt toast every morning.