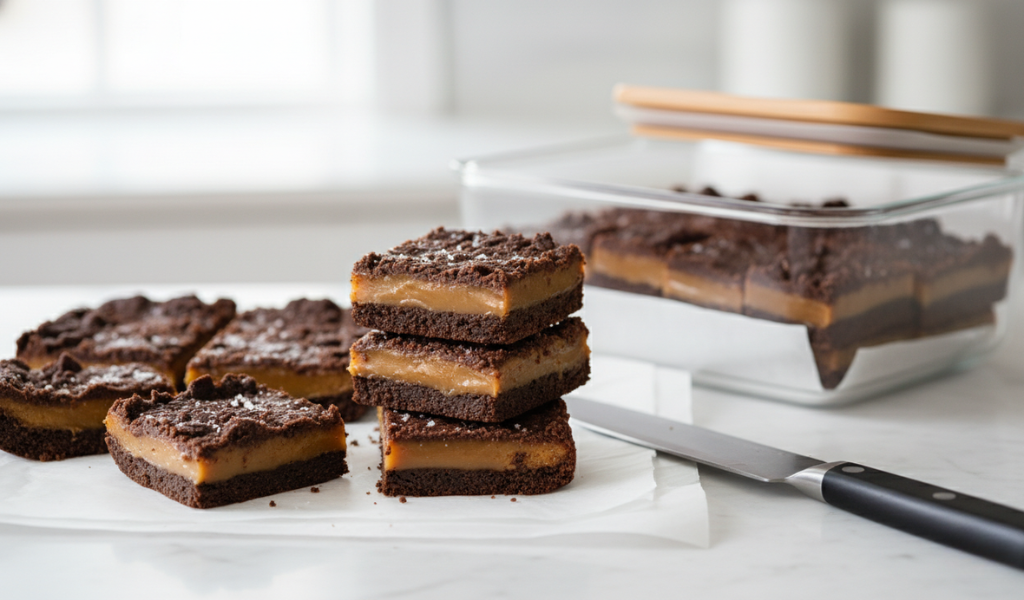
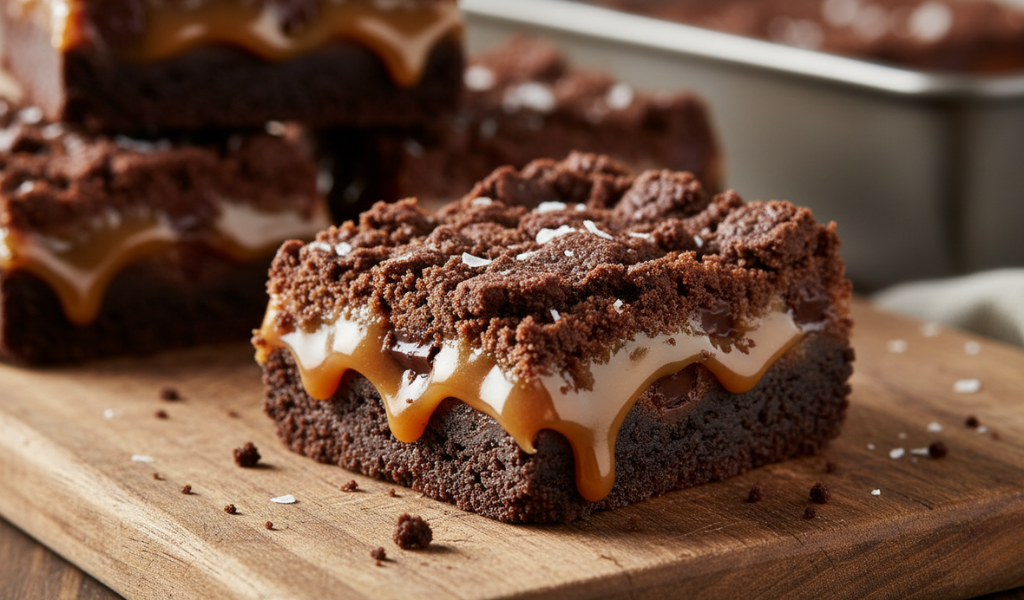
Chocolate and caramel are among the most popular dessert combinations because they balance rich cocoa flavor with smooth sweetness and chewy texture. When you bite into a perfectly baked chocolate caramel bar, you get a mix of textures that is hard to find anywhere else. These bars combine rich chocolate flavor, soft caramel filling, and a light touch of salt for a balanced dessert texture. If you are looking for an easy homemade chocolate caramel bar recipe to impress your family, bring to a party, or just keep in your freezer for late-night cravings, you have found it.
These homemade dessert bars use a soft chocolate dough base layered with gooey caramel and melted chocolate pieces. The same dough is also added on top to create a rich baked texture with crisp edges and a soft center.
What Is a Chocolate Caramel Bar Recipe?
A chocolate caramel bar recipe combines a rich chocolate dough or crust with a soft caramel filling and melted chocolate layers. Most recipes use butter, cocoa powder, caramel sauce or homemade caramel, and baked crumble toppings to create chewy dessert bars with a gooey center. Chocolate caramel bars are commonly served chilled or at room temperature for parties, holidays, and family desserts.
Why This Chocolate Caramel Bar Recipe Works for Different Occasions
Not all dessert recipes are created equal. Some caramel bars end up so stiff that you can barely chew them, while others are so runny that they turn into a puddle the moment you cut them. This recipe fixes all of those problems.
- One Dough, Two Layers: The chocolate base and the top crumble come from the exact same dough. This saves you time and keeps your kitchen counters a little cleaner.
- Balanced Sweetness: By using Dutch-process cocoa powder, salted butter, and a final sprinkle of flaky sea salt, we cut through the heavy sugar. This ensures your chocolate bar style dessert tastes deeply rich rather than sugary sweet.
- The Perfect Texture: Cooking the caramel to a specific temperature ensures that it holds its shape beautifully when sliced, yet stays completely soft, silky, and gooey when you take a bite.
The Secret to Perfect Homemade Caramel
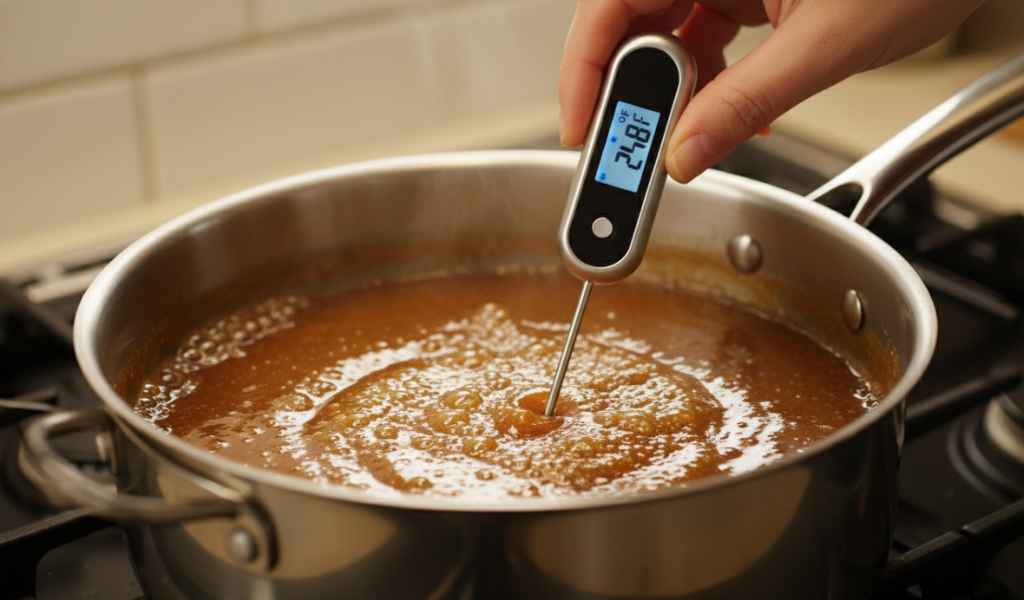
The key to a smooth caramel layer is cooking the sugar mixture slowly until it thickens properly. A temperature around 248°F (120°C) creates a soft and chewy caramel texture that slices cleanly without becoming too hard. Using a digital thermometer helps maintain consistency and prevents overcooking.
Kitchen Note: When checking the temperature, make sure the tip of your thermometer is in the center of the liquid and not touching the hot bottom of the pan. Touching the metal pan will give you a false, high reading!
Ingredients You Will Need
Before you jump into baking this incredible dessert, gather your ingredients. Using kitchen scales to weigh your flour and sugar will give you the most accurate results, but cup measurements work well too if you pack them carefully.
For the Gooey Caramel Layer
- Granulated Sugar (200g / 1 cup): Provides the clean sweetness needed for the caramel base.
- Light Brown Sugar (100g / 1/2 cup): Adds a hint of molasses flavor for a deeper caramel taste.
- Heavy Cream (1/2 cup): Makes the caramel rich and velvety.
- Salted Butter (8 tablespoons / 113g): Adds a savory depth that balances the sweet sugars.
- Light Corn Syrup (1/2 cup): Prevents the sugar from turning grainy or crystallizing.
- Evaporated Milk (1/3 cup): Gives the caramel a smooth, chewy, candy-shop finish.
- Kosher Salt (1/4 teaspoon): Enhances all the rich flavors.
For the Rich Chocolate Dough Layers
- All-Purpose Flour (300g / 2 1/2 cups): The structural base for our chocolate cookie dough.
- Granulated Sugar (250g / 1 1/4 cups): Sweetens the cocoa dough.
- Baking Powder (1 teaspoon): Gives the dough just a tiny bit of lift so it isn’t too heavy.
- Kosher Salt (1 teaspoon): Crucial for balancing the chocolate.
- Salted Butter (14 tablespoons / 198g, melted): Creates a beautifully tender, fudgy crust.
- Dutch-Process Cocoa Powder (35g / 1/3 cup): This is highly recommended! It yields a darker color and a much smoother flavor than natural cocoa powder.
- Semisweet or Bittersweet Chocolate Bar (226g / 8 ounces): Chop this up yourself. You will want half finely chopped to melt into the dough, and half roughly chopped to scatter over the caramel.
- Evaporated Milk (1/3 cup): Binds the dough together without making it wet.
- Vanilla Extract (1 teaspoon): Amplifies the chocolate flavors.
- Flaky Sea Salt (1 teaspoon): For sprinkling on top at the very end.
Step-by-Step Instructions
Follow these clear steps to create your own ultimate chocolate caramel bar. Give yourself plenty of time, as the caramel needs a little bit of patience, and the finished bars need time to cool and set up before you slice them.
Step One: Cook the Caramel
- In a medium, heavy-bottomed saucepan, combine the granulated sugar, light brown sugar, heavy cream, salted butter, and light corn syrup.
- Place the pan over medium-low heat. Stir occasionally with a wooden spoon or silicone spatula until the butter is entirely melted and the mixture is uniform.
- Allow the mixture to keep cooking. Stir occasionally at first, then stir more frequently as it starts to get darker and thicker. You want it to reach a deep golden brown and a temperature of 248°F (120°C). This will take about 25 to 30 minutes.
- The moment it hits the correct temperature, take the pan off the stove. Stir in the salt and the evaporated milk. It may bubble up quite a bit, so be careful!
- Pour the caramel into a heatproof bowl and let it sit on your counter to cool down and thicken slightly for about 30 to 45 minutes. It should still be easily pourable.
Step Two: Prepare the Chocolate Dough Base
- While your caramel is cooling, grab a large mixing bowl. Whisk together your flour, granulated sugar, baking powder, and kosher salt.
- Melt your butter in a small saucepan, then pour it into a bowl.
- In another medium bowl, mix your Dutch-process cocoa powder with 4 ounces (113g) of your finely chopped chocolate bar. Pour 1/4 cup of boiling water right over the top. Stir it up with a spoon until a thick, smooth chocolate paste forms.
- Turn your oven on to 350°F (175°C) so it can preheat. Take a little bit of softened butter and grease a 13×9-inch metal baking pan.
- Add the melted butter, your rich chocolate paste, the evaporated milk, and the vanilla extract into the bowl with your dry flour mixture. Use a silicone spatula to fold everything together. Keep mixing until a single, cohesive chocolate dough forms and all the dry flour pockets vanish.
Step Three: Assemble and Bake the Dessert Bars
- Take roughly two-thirds of your chocolate dough and press it evenly into the bottom of your greased baking pan. You can use your hands or the flat bottom of a measuring cup to smooth it out. Keep the remaining one-third of the dough off to the side for your topping.
- Pop the crust into your preheated oven and bake for 8 to 12 minutes, until it is just barely set.
- Remove the pan from the oven and let it cool on a wire rack for about 5 minutes.
- Sprinkle the remaining 4 ounces of roughly chopped chocolate chunks evenly across the warm cookie base.
- Carefully pour your warm, thickened caramel layer over the top of the chocolate chunks, spreading it out into a smooth, even layer.
- Take your reserved chocolate dough and break it apart with your fingers. Dollop little pieces of the dough all over the top of the caramel. It does not need to cover the caramel completely; a rustic, streusel-like look is exactly what you want.
- Slide the pan back into the oven. Bake for another 16 to 20 minutes. The topping should look set, and the edges of the caramel will look slightly darker and bubbly.
Step Four: The Hard Part – Cooling and Slicing
- Take the pan out of the oven. Let it sit on your counter at room temperature for about 15 minutes.
- Transfer the pan into your refrigerator. Let it chill for at least 3 hours (or even overnight) until the caramel layer has completely firmed up.
- Before slicing, scatter a generous pinch of flaky sea salt across the top of the bars.
- Use a sharp chef’s knife to slice the sheet into 32 small squares. Wipe your knife with a warm, damp paper towel between slices to get beautiful, clean cuts.
Pro Tips for the Best Dessert Bars
To make sure your chocolate caramel bar recipe turns out absolutely perfect on your very first try, keep these expert baking tips in mind:
- Seek Out Dutch-Process Cocoa: Natural cocoa powder is more acidic and sharp. Dutch-process cocoa is treated to reduce acidity, which gives these bars an incredibly smooth, deep chocolate flavor and a gorgeous dark color.
- Don’t Rush the Chill Time: It is incredibly tempting to cut into these bars while they are still warm from the oven. However, if you do, the caramel will run everywhere. Chilling the bars lets the caramel set up perfectly so you get those gorgeous, distinct layers.
- Bring to Room Temp Before Serving: While these bars must be chilled to slice cleanly, they taste best when they have sat out on the counter for about 20 minutes before you eat them. This brings the caramel back to its signature ‘perfectly gooey’ texture.
- Use Quality Chocolate Bars: Instead of using standard chocolate chips (which contain stabilizers that prevent them from melting smoothly), buy a high-quality chocolate baking bar and chop it up yourself. You will get amazing pools of melted chocolate throughout the dessert.
How to Store and Freeze Your Treats
One of the greatest things about these dessert bars is how well they keep, making them an excellent make-ahead option for busy holidays or parties.
In the Refrigerator
Keep your sliced chocolate caramel squares in an airtight container with pieces of parchment paper or wax paper separating the layers so they do not stick together. They will stay fresh and delicious in the fridge for up to 4 days.
In the Freezer
These bars freeze beautifully! Wrap individual squares tightly in plastic wrap and place them inside a heavy-duty freezer bag. They will keep perfectly in the freezer for up to 2 months.
Conclusion
This homemade chocolate caramel bar recipe offers a richer and more flavorful alternative to standard dessert bars. By spending a little extra time creating a rich caramel layer from scratch and using deep Dutch-process cocoa, you end up with a premium dessert that blows store-bought alternatives completely out of the water. They are rich, chewy, slightly salty, and entirely satisfying.
If you are ready to elevate your weekend baking, grab your digital thermometer and whip up a batch of these unforgettable treats. These bars are a great make-ahead dessert option for parties, holidays, or weekend baking.
Have you tried making your own caramel before? Let us know how your bars turned out in the comments below, and don’t forget to share this recipe with the fellow chocolate lovers in your life!
Frequently Asked Questions (FAQs)
Can I use store-bought caramel sauce instead of making it from scratch?
Unfortunately, regular store-bought jarred caramel sauce or ice cream toppings will not work for this recipe. Those sauces are too thin and will turn into a messy puddle when baked. If you absolutely want to skip making scratch caramel, you can melt about 14 ounces of wrapped store-bought caramel candies with a few tablespoons of heavy cream over low heat until smooth, then use that as your layer.
Why did my caramel turn out too hard or brittle?
If your caramel layer turned out crunchy or hard to chew, it means the sugar mixture was cooked past the recommended 248°F (120°C) mark. As caramel cooks longer, more water evaporates, causing it to harden into hard candy when cooled. Using a reliable digital thermometer is the best way to prevent this from happening.
What can I use if I cannot find Dutch-process cocoa powder?
If you cannot find Dutch-process cocoa powder at your local grocery store, you can use regular unsweetened cocoa powder instead. However, keep in mind that your chocolate base will be lighter in color and will have a slightly sharper, more acidic chocolate taste.
Why are my bars falling apart when I try to slice them?
If your bars are crumbling or the caramel is oozing out too much as you cut them, they probably just need more time to cool down. The caramel needs to be thoroughly chilled in the refrigerator for at least 3 hours to firm up completely. For the cleanest cuts, use a sharp knife and wipe it clean with a hot, damp cloth after every single slice.
Can I add nuts to this chocolate caramel bar recipe?
Absolutely! If you love a bit of crunch in your dessert recipes, you can easily add pecans, walnuts, or sliced almonds. Simply scatter about 1/2 cup of toasted, chopped nuts over the chocolate chunks right before you pour the homemade caramel layer into the pan.
Do I have to use corn syrup in the caramel?
The light corn syrup acts as an insurance policy for your caramel. It prevents the granulated sugars from binding together and turning grainy or crystalline. If you prefer not to use it, you can swap it out for an equal amount of brown rice syrup or mild honey, though honey will add its own distinct flavor to the caramel.