Physical Address
304 North Cardinal St.
Dorchester Center, MA 02124
Physical Address
304 North Cardinal St.
Dorchester Center, MA 02124
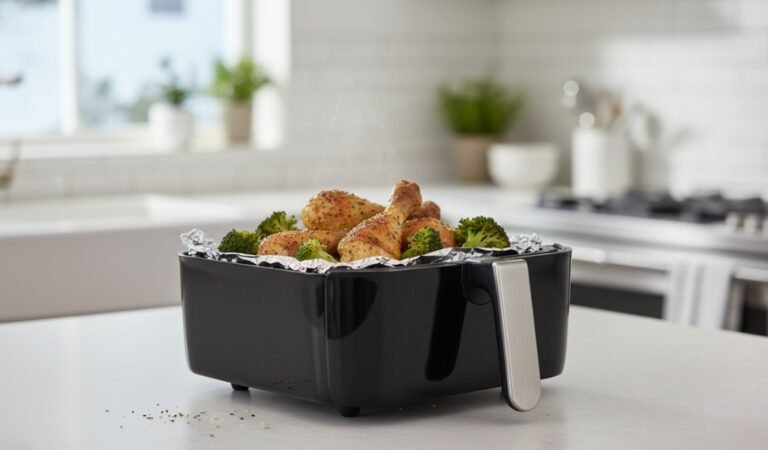
The quest for the perfect bite of meat—one that is juicy, flavourful, and effortless to chew—often feels like a culinary challenge reserved for high-end steakhouses or large-scale industrial processors. In commercial settings, the “magic” of texture happens behind closed doors using massive, high-performance machinery. However, if you have ever asked yourself, “Can you tenderize meat at home?”, the answer is a resounding yes.
While you may not have a factory floor at your disposal, the scientific principles used in those plants—mechanical disruption, atmospheric manipulation, and enzymatic breakdown—can all be replicated in your kitchen. This comprehensive guide explores how to adapt professional meat tenderization techniques for the home cook, ensuring that even the most affordable cuts of meat become the star of your dinner table.
To understand how to tenderize, you must understand why meat is tough in the first place. Meat is composed of muscle fibers held together by a complex network of connective tissue, primarily collagen.
Commercial meat tenderization techniques focus on breaking these collagen “bonds.” If the collagen remains intact, it will contract during cooking, squeezing out moisture and leaving the meat dry.
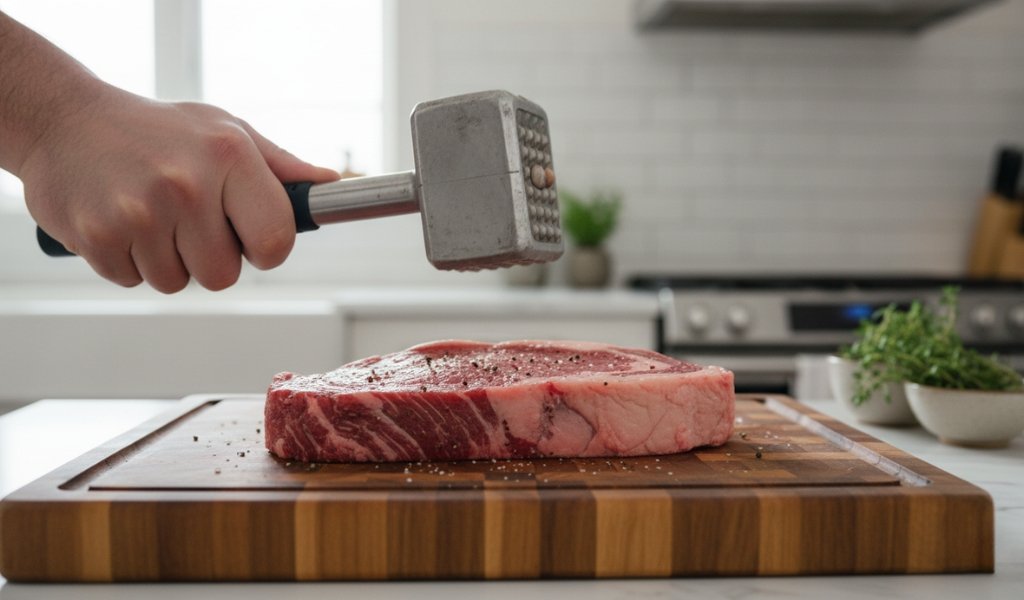
Mechanical methods are the most immediate and visible way to alter meat texture.
In a plant, this involves heavy-duty choppers, but at home, we use simpler but effective tools.
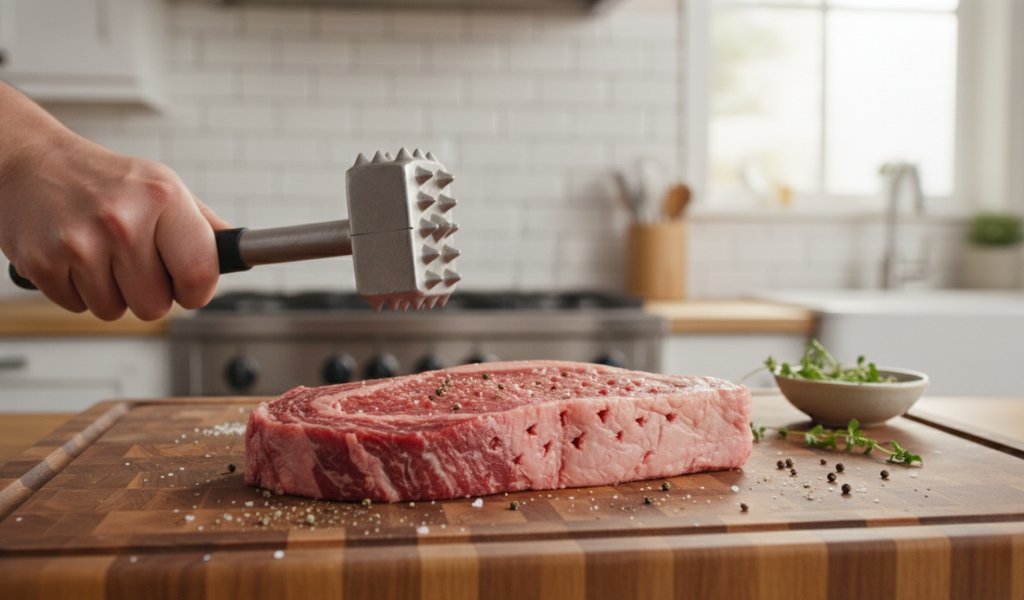
A meat mallet (the classic home tenderizer) has two distinct sides. The spiked side is designed to physically sever muscle fibers and connective tissue. The flat side is used to even out the thickness of the meat. This is vital because consistent thickness ensures that the meat cooks uniformly—preventing the outside from becoming tough and overcooked before the inside reaches a safe temperature.
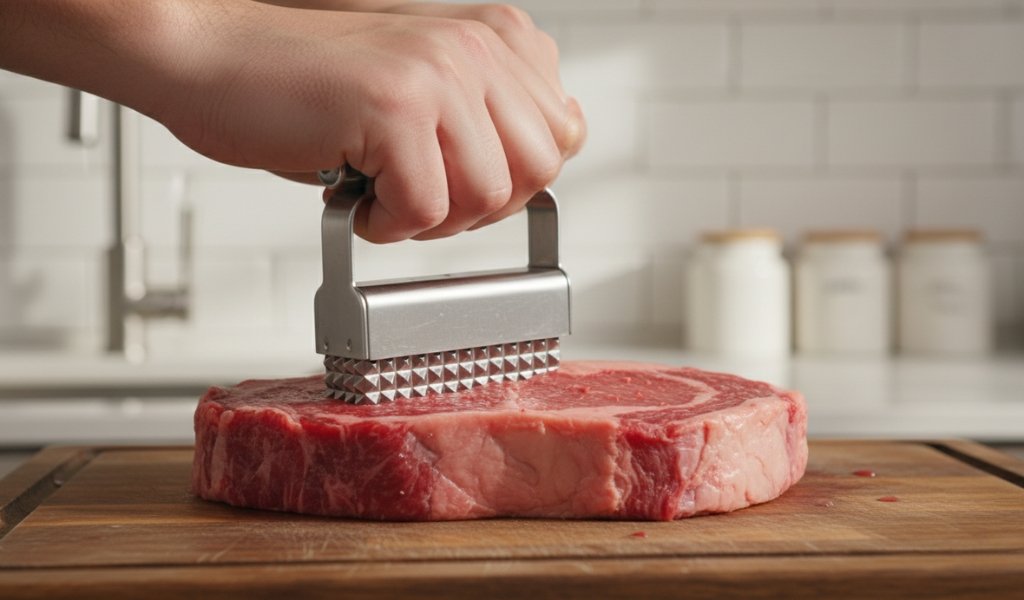
Often called a “Jaccard,” this tool uses a series of sharp, thin needles to pierce the meat. This mimics the industrial “blade tenderization” process. These needles create thousands of tiny channels that allow heat to penetrate deeper and faster. This effectively shortens the cooking time and prevents the meat from “seizing up” or shrinking excessively on the grill.
If a piece of meat is too tough to be eaten as a steak, it is a perfect candidate for the manual meat grinder. By forcing the meat through a die plate, you are performing a total mechanical breakdown of the fiber structure. This is why ground chuck—from the notoriously tough shoulder—makes such a tender burger. You have replaced the need for aggressive chewing with mechanical pre-processing.
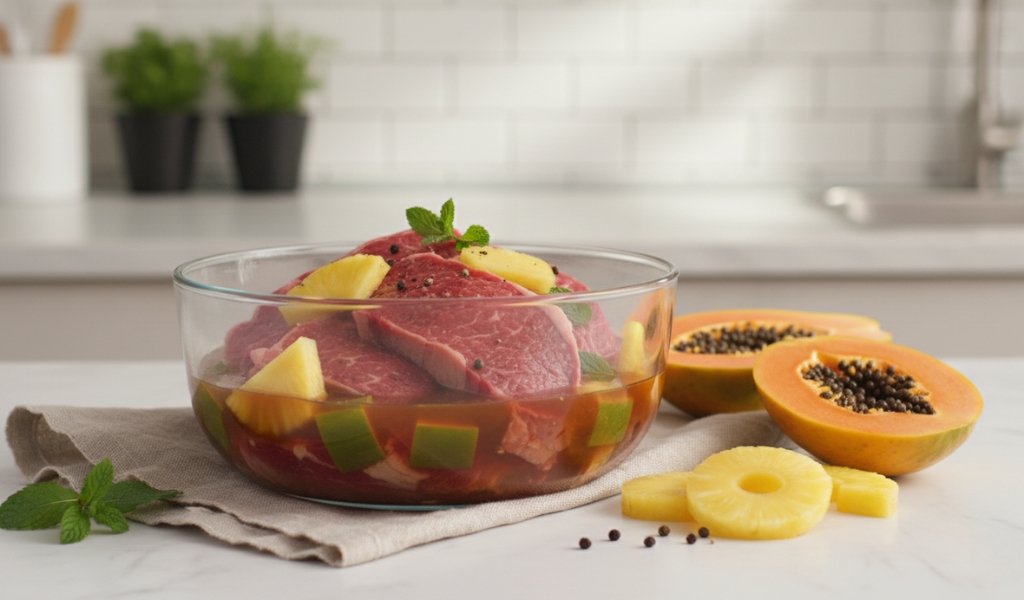
Chemical tenderization involves altering the pH or the protein structure of the meat without necessarily “cutting” it.
Industrial processors often use purified enzymes to treat large batches, but you can find these naturally in common fruits.
Sometimes, the best tenderizer is simply a low-temperature oven or a slow cooker. This is the process of converting collagen into gelatin. This transformation happens slowly and continues over several hours. This is why a tough pot roast eventually becomes “fork-tender.” The heat does the work of the chopper by dissolving the connective tissue that holds the fibers together.
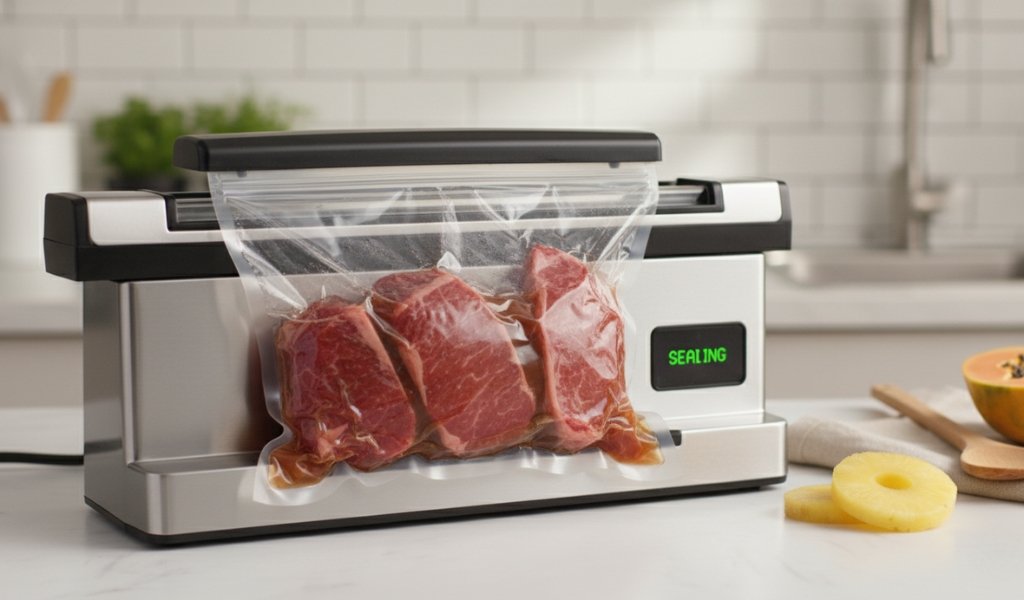
In large meat processing plants, machines called vacuum tumblers are used to help meat absorb moisture and marinades more effectively. You can simulate this by using a home vacuum sealer.
| Industrial Process | Professional Machine | Home Tool / Technique |
| Mechanical Pounding | Hydraulic Flatteners | Spiked Meat Mallet |
| Fiber Severing | Blade Tenderizer | Needle (Jaccard) Tool |
| Structure Reduction | Bowl Choppers | Manual Meat Grinder |
| Atmospheric Infusion | Vacuum Tumblers | Vacuum Sealer + Marinade |
Mastering these techniques isn’t just about better dinner; it’s about smart economics.
Mastering meat tenderization at home is about choosing the right tool for the right cut. Whether you are using a manual meat grinder to make a custom burger blend or a needle tenderizer to prep a thick ribeye for the grill, you are applying the same logic as the world’s largest food processors. By combining mechanical, chemical, and thermal techniques, you can ensure that every meal you serve is tender, juicy, and perfectly prepared.
A: Always tenderize before or during marinating. Using a needle tenderizer first creates channels that allow the marinade to reach the center of the meat, rather than just flavoring the surface.
A: You can, but use the “Pulse” setting sparingly. A food processor can turn meat into a paste very quickly. Unlike a commercial TALSA K205spp, home processors generate heat rapidly, which can melt the fat and ruin the “snap” of the meat.
A: This usually happens if you over-work the meat after grinding. Like the Daniels DMX 100 Mixer, you want to mix just enough to distribute seasoning. Over-handling creates tight protein bonds that result in a rubbery texture.
A: It is most effective for chicken breast, pork loin, and lean beef used in high-heat applications like stir-frying. It is less effective for large, thick roasts meant for slow cooking.
A: If the meat feels “spongy” or “mushy” to the touch before cooking, or if it lacks any grain or “bite” after cooking, it has been over-processed, likely by too much enzymatic action or excessive mechanical pounding.