Physical Address
304 North Cardinal St.
Dorchester Center, MA 02124
Physical Address
304 North Cardinal St.
Dorchester Center, MA 02124

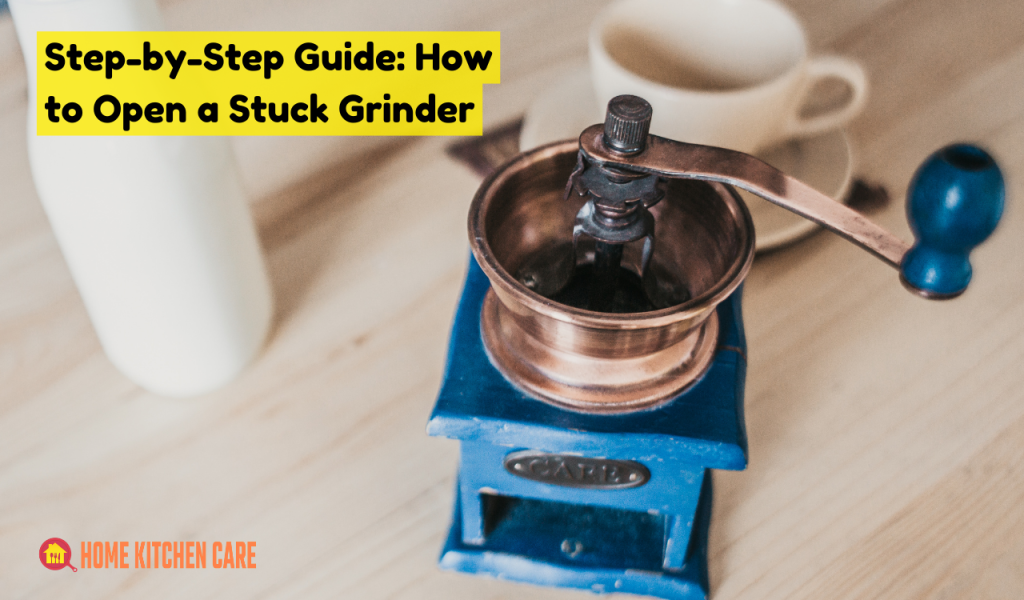
Having trouble with a stubborn grinder? Wondering how to open a stuck grinder without the hassle? We’ve got you covered! In this quick guide, we’ll share some nifty tips and tricks to tackle that jammed grinder like a pro. Say goodbye to frustration and hello to smooth grinding in no time. Ready to unlock the secrets of hassle-free grinding? Let’s dive right in!
Main Summary: How to Open a Stuck Grinder?
Learn how to effortlessly open a jammed grinder! Apply a mix of lubrication and gentle force. Use a rubber band for extra grip. Safeguard your hands with gloves. Master the art of freeing your grinder hassle-free!

Before you embark on the process of opening your stuck grinder, it’s crucial to gather all the necessary tools and equipment. Having the right tools at hand will make the task easier and more efficient. Here’s a comprehensive list of items you’ll need:
It’s essential to wear rubber gloves to protect your hands during the process. They will provide a better grip and shield your skin from any sharp edges or potential irritants.
This is an effective solvent that can help loosen stubborn grime, residue, or sticky substances inside the grinder. It will facilitate smoother movement when trying to open the stuck parts.
Prepare a supply of clean, lint-free cloths or paper towels to wipe down the exterior and interior of the grinder. This will ensure that you remove any loose particles, dust, or dirt that might hinder the opening process.
Check the grinder for any screws holding the components together. Depending on the model, you may need a Phillips screwdriver to remove these screws and access the interior parts.
An old toothbrush or a dedicated cleaning brush with firm bristles will be invaluable for reaching and cleaning hard-to-reach areas inside the grinder. This will help dislodge any compacted particles and residue.
In case the grinder’s cap or lid is tightly sealed, you might need pliers or an adjustable wrench to provide extra leverage and torque when trying to open it.
This natural cleaning solution can be used to tackle persistent stains or odors inside the grinder. Mix baking soda with water to create a paste and apply it to affected areas for a more thorough cleaning.
Keep a lint-free cloth or a microfiber cloth handy for drying and polishing the grinder components after cleaning.
These small cotton swabs are ideal for cleaning tight spots and crevices that may be difficult to reach with other tools.
Once you’ve successfully opened the grinder, lubricate the moving parts with a small amount of vegetable oil or a food-grade lubricant to ensure smooth operation.
A flashlight or headlamp will be useful for illuminating dark areas inside the grinder, especially if you’re working in dimly lit surroundings.
Prepare a clean and dry container to place the disassembled grinder components during the cleaning process. This will help you keep track of the parts and prevent any loss.
Grinders can get stuck for various reasons, and understanding the cause will help you tackle the issue more effectively. Here are some common reasons why your grinder might be stuck:
One of the most common reasons for a stuck grinder is the accumulation of residue over time. Oils and fine particles from spices or coffee can find their way into the crevices and threads of the grinder, causing the components to stick together. This residue buildup can result from regular usage without thorough cleaning, leading to decreased mobility and difficulty in opening the grinder.
High humidity levels can also be a contributing factor to a stuck grinder, especially if the grinder is not adequately protected from moisture. Humidity can lead to condensation inside the grinder, causing components to swell or corrode over time. This increased friction and resistance can make it challenging to unscrew or open the grinder, making routine cleaning and storage in a dry environment essential.
Cross-threading occurs when the grinder’s parts are not properly aligned during closure. If you inadvertently cross-thread the cap or lid when sealing the grinder, it can become jammed, making it difficult to open later on. Avoiding cross-threading is crucial for preventing the frustration of a stuck grinder, so take care when closing the grinder to ensure the threads align correctly.
A grinder with faulty or rusty parts can be prone to sticking. Damaged or rusted components can hinder smooth movement and cause resistance when attempting to open the grinder. Regular maintenance, including inspecting and replacing damaged parts, can help prevent this issue and keep your grinder operating smoothly.
Grinders have a designated capacity for holding spices or coffee beans, and overstuffing can lead to a stuck grinder. Excess material can put undue pressure on the components, causing them to jam or bind together. To avoid this, ensure you fill the grinder within its recommended capacity to maintain optimal functionality and prevent unnecessary strain on the device.
Now that we’ve covered the reasons behind a stuck grinder let’s proceed with the step-by-step guide to open it:
Start by preparing the grinder for the opening process. If your grinder is electric, ensure it is unplugged before proceeding. Allow the grinder to cool down if you’ve recently used it to avoid any risk of burns or accidents during the opening process.
Before handling the grinder, put on a pair of rubber gloves. The gloves will not only provide a better grip but also protect your hands from any sharp edges or potential irritants that may be present inside the grinder.
Before attempting to open the grinder, it’s essential to clean the exterior to remove any loose particles, dust, or dirt. Use a clean cloth or paper towels to wipe down the surface of the grinder thoroughly.
If you notice any grime, residue, or sticky substances on the grinder, apply a small amount of rubbing alcohol or isopropyl alcohol to a clean cloth. Gently clean the affected areas to help loosen and dissolve any stubborn dirt.
With your rubber-gloved hands, try to unscrew the cap or lid of the grinder. If it doesn’t budge, do not force it, as excessive pressure may cause damage. Instead, proceed to the next step.
If your grinder has screws holding the parts together, carefully use a Phillips screwdriver to remove them. Keep the screws in a safe place to avoid misplacing them. Removing the screws will grant you access to the interior components.
Hold the grinder upside down and tap it gently against a solid surface. The tapping action can help dislodge any stuck particles or residue inside the grinder, making it easier to open. Be cautious not to tap too forcefully to avoid causing damage.
If tapping alone doesn’t work, use an old toothbrush or a dedicated cleaning brush with firm bristles to brush away any remaining residue or particles. Focus on hard-to-reach areas, crevices, and threads where debris might be trapped.
For persistent stains or lingering odors, create a paste using baking soda and water. Apply the mixture to the affected areas and let it sit for a few minutes. The baking soda’s natural cleaning properties will help break down stains and neutralize odors.
If the cap or lid is still stuck despite your best efforts, you can use pliers or an adjustable wrench to provide extra leverage and torque. Be careful not to overtighten or damage the grinder during this process.
Once you’ve successfully opened the grinder, take the opportunity to clean all its parts thoroughly. Remove any residue, baking soda paste, or debris to ensure smooth grinding in the future. After cleaning, reassemble the grinder, making sure all parts fit snugly but not too tight.
After reassembling the grinder, consider lubricating the moving parts with a small amount of vegetable oil or food-grade lubricant. This will ensure smooth operation and prolong the life of your grinder.
Ensuring your safety during the process of opening a stuck grinder is of utmost importance. It involves handling potentially sharp or delicate components and using tools that require care and attention. To minimize the risk of accidents or injuries, follow these detailed safety precautions:
If you have an electric grinder, always unplug it before attempting to open it. This will prevent any accidental activation of the grinder while you are working on it, reducing the risk of electrical shocks or injury.
Before starting, allow the grinder to cool down if it has been in use recently. Hot components can cause burns or discomfort when touched, so it’s essential to let the grinder cool to a safe temperature.
Ensure you have adequate lighting in your workspace, especially if you’re working on a small or intricate grinder. Proper lighting will allow you to see what you’re doing clearly and minimize the chances of making mistakes or causing damage.
Always wear rubber gloves when handling the grinder. The gloves will provide a better grip on the surfaces, reduce the risk of slipping, and protect your hands from sharp edges or potentially hazardous materials.
While a little force may be necessary to open the stuck grinder, avoid using excessive pressure that could damage the grinder or cause injury. Apply gradual, controlled force and stop if you encounter significant resistance.
Grinders can have sharp edges, especially when disassembled for cleaning. Be careful while handling the components to avoid accidental cuts or injuries. Consider using tools like pliers or a wrench to avoid direct contact with sharp edges.
If you’re cleaning the grinder or using liquids like rubbing alcohol, ensure it’s completely dry before reassembling and using it. Water or liquid residue inside the grinder can damage its electrical components or cause rust.
Refer to the grinder’s manual or manufacturer’s guidelines for specific instructions on opening and cleaning the grinder. Understanding the manufacturer’s recommendations will help you work more effectively and avoid any potential hazards.
If you need to remove screws during the opening process, keep them in a safe container or designated area. Misplacing screws can lead to difficulties during reassembly and potentially damage the grinder.
Take your time during the process and proceed with caution. Rushing can lead to mistakes or accidents. If you encounter unexpected difficulties, step back, and reassess the situation before continuing.
Ensure that children and pets are kept away from your workspace during the entire process. Grinders and tools can be dangerous, and having distractions around can increase the risk of accidents.
If the step-by-step guide mentioned above doesn’t work to open your stuck grinder, don’t worry! There are alternative methods you can try before giving up. Here are a few additional approaches to consider:
Applying heat to the stuck parts of the grinder can expand the metal slightly, potentially loosening the components and making it easier to open. You can use a hairdryer on low heat or immerse the grinder in warm water (for manual grinders, not electric ones) to try this method. Ensure you don’t overheat the grinder, as excessive heat can cause damage.
On the opposite end of the spectrum, freezing the grinder may also help. The cold temperatures can cause the metal to contract, potentially breaking the bond between the stuck parts. Place the grinder in a sealed plastic bag and put it in the freezer for a few hours before attempting to open it. Be cautious when handling a cold grinder to avoid injury.
Gently tapping the sides or base of the grinder with a rubber mallet can help dislodge the stuck parts without causing damage. Avoid using excessive force, as you don’t want to dent or deform the grinder. The goal is to provide a gentle impact to loosen the components.
Using a food-safe lubricant or penetrating oil, such as WD-40, can help loosen the stuck components. Apply the lubricant to the threaded areas and allow it to seep in for a few minutes before attempting to open the grinder. Lubricants can reduce friction and ease the opening process, but be cautious not to apply too much, as excess lubricant may be difficult to clean.
Wrap rubber bands around the stuck parts of the grinder to create additional grip. The rubber bands can increase traction and make it easier to turn the cap or lid. Make sure the rubber bands are tightly wrapped and do not obstruct the threading.
Combine the heat and cold methods for a more powerful effect. First, immerse the grinder in warm water or use a hairdryer to heat the stuck parts slightly. Then, immediately transfer the grinder to the freezer for a few minutes. The rapid change in temperature can create a thermal shock, potentially loosening the components.
For particularly stubborn residue or grime, consider using a vinegar solution. Mix equal parts of white vinegar and water and apply the solution to the stuck areas. The acidity of the vinegar can help break down tough residue and make it easier to open the grinder.
Preventing your grinder from getting stuck in the first place is the best approach to ensure smooth and hassle-free grinding. By taking some preventive measures and regular maintenance, you can maintain your grinder in optimal condition and avoid the frustration of it getting jammed. Here are some comprehensive preventive steps to follow:
Regularly clean your grinder after each use to prevent residue buildup. Use a dry brush or cloth to remove loose particles, dust, or leftover grinds from the grinder’s interior and exterior surfaces. Pay special attention to the grinding chamber, crevices, and threads.
Periodically disassemble the grinder for a more thorough cleaning. This will allow you to access hard-to-reach areas and remove any accumulated residue or fine particles that may hinder the grinder’s functionality. Refer to the manufacturer’s guidelines on how to disassemble and clean your specific grinder model.
Moisture can cause components to stick and lead to rust, especially if the grinder is not adequately protected. Avoid exposing your grinder to excessive humidity or water. After cleaning, ensure the grinder is completely dry before reassembling and using it.
Store your grinder in a dry place, away from areas with high humidity, such as the kitchen sink or near a dishwasher. Moisture can accumulate over time, causing components to stick or corrode.
Avoid overfilling the grinder with spices or coffee beans. Operating the grinder within its recommended capacity will reduce strain on the components and minimize the chances of jamming. Follow the manufacturer’s guidelines on the maximum capacity of your grinder.
Regularly inspect your grinder for any damaged or worn-out parts. Check for cracks, chips, or signs of rust. Damaged components can hinder the grinder’s operation and lead to jamming. If you notice any issues, replace the faulty parts promptly.
Ensure you’re using the correct type of grinder for the materials you intend to grind. Different grinders are designed for specific purposes, such as coffee grinders for coffee beans or spice grinders for whole spices. Using the wrong grinder can lead to jamming and damage the device.
Refrain from grinding materials that are too hard or fibrous for your grinder to handle. Examples include coffee beans with rocks or hard spices like cinnamon sticks. Grinding such materials can damage the grinder’s blades and result in clogging or jamming.
Periodically lubricate the moving parts of your grinder with a food-grade lubricant or vegetable oil. Lubrication will help reduce friction, ensuring smooth operation and extending the life of the grinder.
If your grinder has adjustable grind settings, try to store it consistently at a particular setting. Frequent adjustments can cause wear and tear on the grinder’s adjustment mechanism, leading to potential issues with jamming.
Mastering some useful tips and tricks will not only help you open a stuck grinder more effectively but also improve your overall grinding experience. These additional techniques can come in handy in various situations and save you time and effort. Here are some detailed tips and tricks to keep in mind:
Opening a stuck grinder may require some persistence. Avoid rushing or applying excessive force, as this can lead to damage or make the situation worse. Take your time and work steadily to avoid any mishaps.
When attempting to open the grinder, apply even pressure on the cap or lid. Avoid twisting it in one direction only, as this can cause cross-threading and make it more difficult to open. Applying even pressure ensures that the threads align correctly.
Place the grinder on a non-slip surface or use a rubber mat to prevent it from sliding while you’re trying to open it. A stable surface will give you better control during the opening process.
If the grinder is not budging, try gently tapping it against a solid surface while simultaneously rotating it. The tapping action can help dislodge any stuck parts, while rotating distributes the impact evenly.
Maintain your grinder by cleaning it regularly and lubricating the moving parts. A clean grinder with well-lubricated components operates more smoothly and reduces the likelihood of jamming.
For a better grip on the stuck parts, wrap rubber bands around them. The rubber bands increase traction and make it easier to turn the cap or lid. Ensure the rubber bands are tightly wrapped and do not obstruct the threading.
Combining the heat and cold methods can be effective in breaking the bond between stuck parts. Start by gently heating the grinder using a hairdryer or warm water. Then, immediately transfer it to the freezer for a few minutes. The thermal shock can aid in loosening the components.
For particularly stubborn residue or grime, a vinegar solution can be effective. Mix equal parts of white vinegar and water, and apply the solution to the stuck areas. The vinegar’s acidity helps break down tough residue, making it easier to open the grinder.
If you need extra leverage, use pliers or an adjustable wrench with caution. Grip the grinder firmly and avoid overtightening, as it may cause damage to the grinder’s threads or body.
As you disassemble the grinder, keep the components in a clean and dry container. This will help you keep track of the parts and prevent any loss during the cleaning process.
If all attempts fail, consider seeking professional assistance from a repair service or the manufacturer. Trained technicians can diagnose the issue and safely disassemble the grinder if required.
In conclusion, opening a stuck grinder can be a manageable task with the right approach and tools. By following the step-by-step guide, exploring alternative methods, and implementing preventive measures, you can ensure a smooth and hassle-free grinding experience.
Remember to prioritize safety, exercise patience, and seek professional help if needed. With these tips and tricks, you’ll have your grinder unstuck and ready to grind to perfection. Happy grinding!
To open a stuck grinder without causing damage, try using a rubber grip or applying heat and cold alternately. Be patient, apply even pressure, and avoid using excessive force. Lubricants can also help in easing the opening process.
Grinders can get stuck due to residue buildup, worn-out parts, or improper handling. To fix it, clean the grinder regularly, replace damaged components, and follow proper usage guidelines. Lubricating moving parts can also prevent jamming.
Yes, there are alternative methods to try. You can use heat or cold to expand or contract the grinder’s parts. Tapping with a rubber mallet, applying a vinegar solution, or using rubber bands for extra grip are other options.
Yes, lubricants like food-grade oil or penetrating oil can help loosen stuck grinder parts. Apply the lubricant to the threaded areas and let it seep in for a few minutes before attempting to open the grinder.
A grinder may not twist open due to cross-threading or residue buildup. To address it, ensure even pressure while twisting, clean the threads, or try tapping and rotating the grinder to dislodge stuck parts.
Wear rubber gloves to protect your hands. Work on a non-slip surface and avoid using excessive force. If using heat or cold, handle the grinder with care. Always prioritize safety during the opening process.
The tools and techniques may vary based on the type of grinder. For some, a Phillips screwdriver may be needed to access internal parts. Rubber grips, pliers, or wrenches can provide extra leverage for tightly sealed grinders.
If all attempts fail, consider seeking professional assistance from a repair service or the manufacturer. Trained technicians can diagnose the issue and safely disassemble the grinder if required.
Using heat or cold can be safe if done properly. Avoid overheating or freezing the grinder excessively. The goal is to apply mild heat or cold to expand or contract the parts without causing damage.
Regularly clean your grinder after each use to prevent residue buildup. Disassemble and clean it thoroughly every few weeks. Lubricate the moving parts periodically and inspect for damaged components. Following a consistent maintenance schedule will help prevent jamming.